PORKY PIG 3D MODEL

Porky Pig 3D Model
Introductions Porky Pig 3D Model:
Porky Pig 3D Model, from the Warner Bros. Looney Tunes and Merrie Melodies series of cartoons. Porky was the first character created by the studio to draw audiences based on his star power, and the animators created many critically acclaimed shorts featuring the him. He is known for his signature line at the end of many shorts, "(stutter) that's all, folks!" Some supports are required on one piece, head (see notes below). If you have the proper filament colors, no painting is needed. The assembled model is 225mm tall.. Enjoy!
Print Instructions:
Supports: head (see notes for details) Resolution: .2mm Infill: 15%
Building the model:
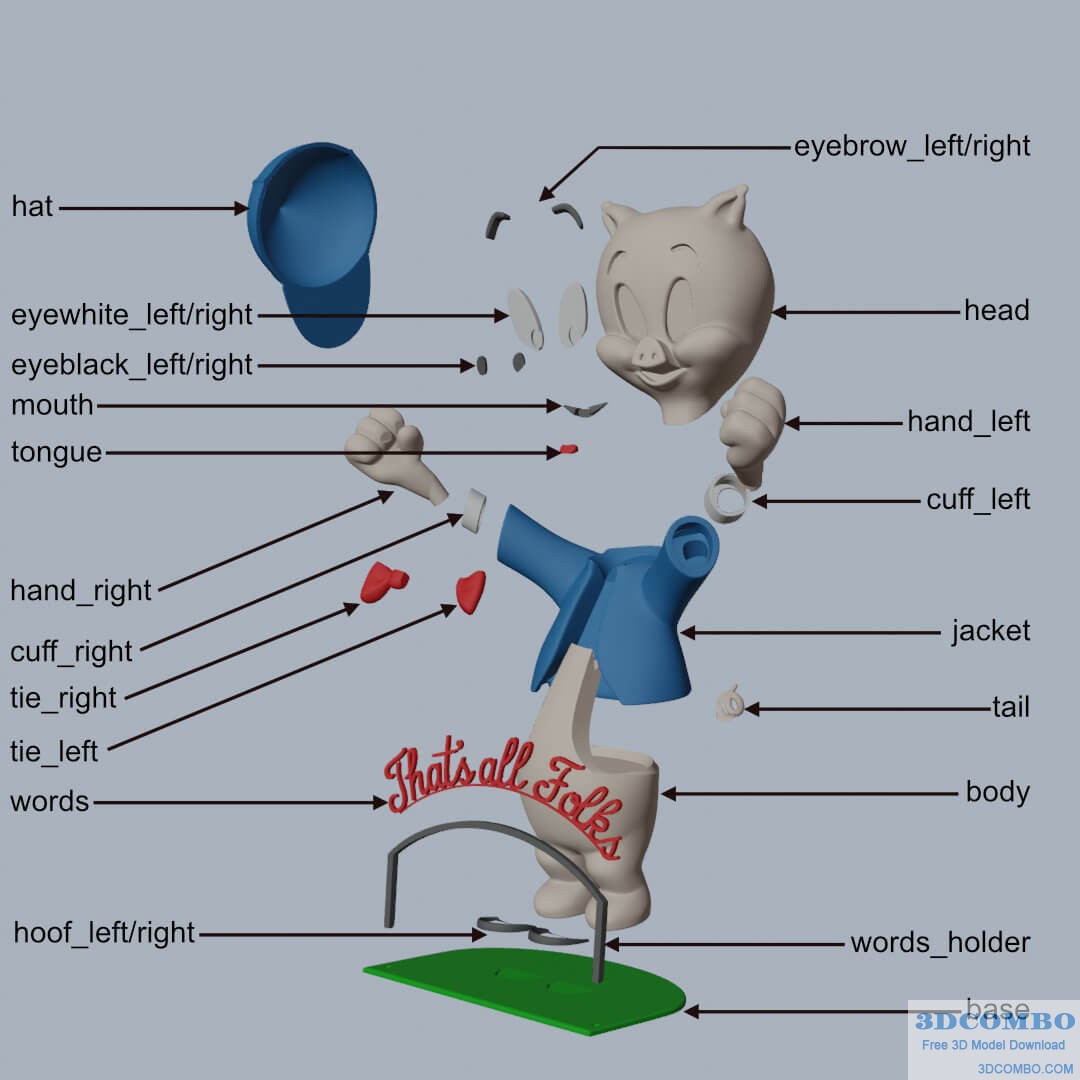 Colors Black: (Devil Designs PLA - Black) eyeblack_left eyeblack_right eyebrow_left eyebrow_right hoof_left hoof_right mouth words_holder .. Red: (Hatchbox PLA - True Red) tongue words tie_left tie_right .. Green: (Hatchbox PLA - True Green) base .. Blue: (Paramount3D PLA - Cadet Blue) jacket hat .. Skin: (Paramount3D PLA - Universal Beige) head hand_left hand_right body tail .. White: (Devil Designs PLA - White) cuff_left cuff_right eyewhite_left eyewhite_right
Printing and assembly tips:
Printing tips: 1 - Supports are required on the following part: head (I used organic/tree supports, from base only, 30deg overhang)
2 - There are some pieces that may need brims or rafts, use your discretion. When setting up my prints I prefer to be conservative to ensure the least chance of a print failure, especially since the base of many parts are hidden when inserted into another part. *I used a brim on: hand_left hand-right tie_left tie_right 3 - When removing parts from the printer bed, it's a VERY good idea to place left/right parts into separate containers to help with the assembly process. Sometimes the difference between the left and right parts is very small but it is still worth keeping track of them (especially if you size up the model significantly) and assembling them in their proper place. .. Assembly tips: 1 - Take your time gluing the model together and enjoy the process. Dry fit all the parts and give some thought into which parts to glue together as groups and then gluing the groups together. Let the glue for each group set completely before combining groups. 2 - I used 3D Gloop and E6000 to put this model together. Each type of glue has different pros/cons and I found that fast drying 3D Gloop was far easier to use than superglue (for me). The E6000 sticky glue allows more time to position parts and is still the best for smaller parts. For both glues using a smaller amount is usually better than more glue. 3 - Assembly is straight forward, however there are two suggestions that came up during QA: Put in the cuffs first into the jacket to ensure proper alignment before putting in the hands. Put in the tail last to avoid potentially breaking it while building the rest of the model. 4 - Refer to the assembly diagrams in the pictures section as well as the uploaded pictures for putting the model together. The model is meant to be glued. Do not hesitate to ask questions, feedback is essential to making better models.
| File Format | zip |
|---|---|
| File Size | 10.75 MB |
| Version | N/A |
| Created Date | 2025/06/12 |
| Last Updated | 2025/06/24 |